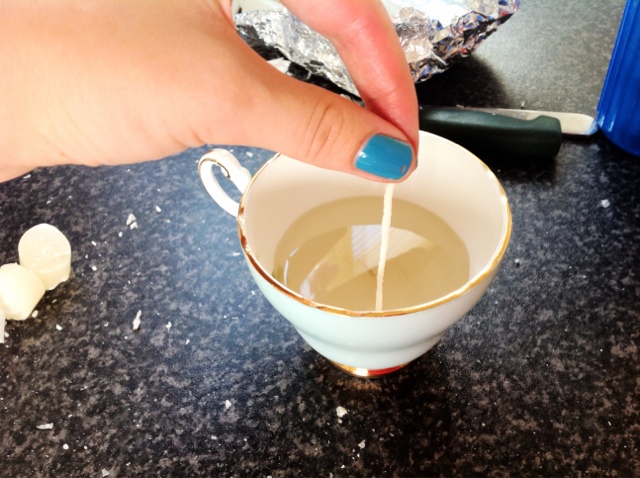
One of the things that I like about Hobbycraft is their website, because, as well as listing all of their products to buy, they also have a vast array of craft tutorials for you to follow at home. So over the past day-and-a-half, I've been following one myself and have been busy making my own vintage-style teacup candle.
The very best thing about the afore-mentioned tutorials is that they are free - so I can share them with you! Below are the basic Hobbycraft instructions, adapted and embellished by yours truly. This is how I managed to make my teacup candle...
- First prepare the teacup; yes, this tutorial requires you having a pretty (and spare) vintage teacup lying around the house. I know that that's a bit much to ask, but the good news is that you can use almost anything to make a candle, as long as it is heatproof. I've seen really pretty candles made in jelly moulds, egg cups, all sorts. Then cut a piece of wick about 5cm longer than the height of the cup, and tie it onto a skewer (due to a distinct lack of skewers, I had to use a cookie dough hook). Then balance it on top of the cup with the longer end of the wick dangling inside.
- Hobbycraft recommends that you use its wax chips or pellets, but I used some old candles, which you can see in the picture below. Once they're wiped clean, they're perfectly fine to chop up and use instead of pellets and it also means that you should be able to get away with not adding stearin to your molten wax (this improves the burning quality of the finished candle), because it's already been a candle before.
- Next, quarter fill a large saucepan with cold water. Place the chopped up wax, pellets or chips into the smaller pan, then place it inside the large pan, resting on a trivet if necessary. I found that it worked just as well to just hold the smaller pan by its handle inside the larger one - but then I'm just looking for ways to cut corners! Gently bring the water to the boil, and simmer on a low heat until the wax melts.
- Now here comes the part that I ignored, but if you're using Hobbycraft's beeswax pellets, I'd strongly recommend adding the stearin - when the wax becomes molten, add 1 tablespoon of stearin per pound of wax, which will improve the burning quality of the finished candle. Also add some shavings of dye if a coloured candle is desired At this point, you could also try adding a few drops of essential oils to give your candle a delicate scent. I'm thinking about trying a tea tree or peppermint one next time.
- Once the wax has completely melted, pour it into an old plastic jug. Then transfer the molten wax to the teacup, and leave to cool. At this point, I ought to add that the old part of the plastic jug is important, because it's pretty difficult to get the excess wax off when you've finished (sorry, Mum). But don't worry, the saucepans will come up fine after a good scrub.
- If a 'well' forms around the wick, top up with more hot wax. This well is the reason that I had to make the candle over two days; if you leave the candle to set properly overnight, it should be plenty hard enough to top up the well the following morning.
- Once the candle has cooled completely, untie the wick from the skewer and trim. And you're done! It's not a very difficult thing to make, but you need to make sure that you have the time and patience to wait while the wax sets in the teacup - and the energy to do all that washing up afterwards!
So there you have it - an easy-to-make, do-it-yourself vintage-style candle. (Hyphon overload...!) I think they'd make lovely Christmas or birthday gifts; it's always nice to receive a thoughtful, homemade present.
Let me know how you get on if you decide to give this a go!
(I'm not affiliated with Hobbycraft in any way. All thoughts and ramblings are my own. Here's the link to the original tutorial)


